Showing posts with label Tips and Tricks. Show all posts

Monday, 30 January 2012

Makeup Tips We Love!

Your foundation looks cakey? Eyeshadow that doesn't stay the whole day? Blusher that making you look 10 years older? Oily and shiny T-zone? Are these the problems that you're facing everyday with your makeup routine? Worry not! Here are some makeup tips that i guarantee will be very helpful and will definitely solve your make up problems! 


For Thy FACE

1. Always prep your skin with a face primer or moisturizer if you do not have one before applying foundation. 
    -This will gives you a flawless finish and covers up your pores. Your foundation will last longer too!

2. Mix your liquid concealer with a moisturizer. 
    - It will gives a better blending with your skin color.

3. Apply your foundation by spotting it where it's necessary instead of applying it the whole face.
    - This will makes your make-up looks more natural and a barely-there finish.

4. Problems with blemish?
    - Forget about the concealer. Use the thickened base collected in the cap of your foundation or BBCream. 
       Dab it with your fingers and set with powder. Trust me, it gives a better coverage than a concealer.

5. Cakey and fine lines after applying foundation?
     - Press loose powder on the face if you're using a sponge, not swipe. If you're using a powder brush,make
        sure you tap away the excess powder before lightly applying it in circular motion. 

6. Shiny T-Zone?
     - Blot away the excess sebum before touching up with a pressed powder or else you'll have a cakey face.

7. Blemish or Sensitive skin?
     - Try to look for a mineral foundation. 

8. Clogged pores after using foundation or BB Cream?
     - Apply your foundation or BB cream in downwards motion as this will prevent the products from getting  
       into the pores. Remember to apply your skin care in upwards and circular motion!

9. Having a foundation that's too thick and making you look 10 years older?
     - I had this problem once after purchasing a wrong foundation. Do not throw it away but instead, mix it 
        with your moisturizer so that it's thinner and gives a natural finish. 

10. The most important thing out of all - Wash and Sanitize your hand before applying makeup especially 
      when you're doing it with your fingers. Unless you like breakouts! =P


For that Charming EYES

1. Conceal your panda eyes! 
    - No makeup looks good with undereyes circle. Applying makeup without concealing it make only 
      emphasize the dark circles and makes you look tired and worn out!

2. How to conceal your dark circles perfectly?
     - Dot concealer on the inner and below your eye and then pat it with your ring finger, not swiping it. Set it 
        with loose powder.

3. Creased Shadow ? 
     - This will normally happen to one with oily eyelids and if you're the one, try to avoid cream shadow, 
        instead use a powder eyeshadow. If you're a big fans of cream shadow and can't live without it, my  
        advice is to apply a thin layer of powder eyeshadow after applying your cream shadow of of the same 
        shade.

4. Longer lasting eyeshadow?
     -Use an eyelid primer before applying your eyeshadow. Not only making your eyeshadow last longer,
       it will enhance the color of your eyeshadow as well. 

5. Precise and fool-proof eyeliner
     - Dot your eyeliner along the lashline for your desirable line and then connect the dots. This is the best way
       for those who want to start using a liquid liner. You can draw your liner with a single stroke when you're
       good at it. Remember, practice makes perfect!

6. For a longer lasting eyeliner
     - trace your eyeliner with an eyeshadow brush after lining your eye with an eyeliner no matter it's a pencil, 
        liquid or gel liner. Trace ut with a black shadow for a dramatic effects or soften the look with a brown
        shadow.

7. For a bigger looking eyes
     - this is my own way of applying the eyeliner for a bigger looking eyes and not too harsh for a daytime 
       look. Line your eye with a liquid liner, starting for the middle of your lash line instead of the inner corner 
      of the eyes. Bring it out and end it with a slight flip. This will make your eyes look bigger and longer. Then,   
      line your lower lash line just about 0.5 cm and connect it to the flip. Dab some brown shadow over the 
      liner.

8. Shimmer VS matte shadow
     -Shimmer eyeshadow are nice and fun but it's not easy to wear as it will emphasize tired and puffy eyes.
      Choose a matte one if you opt for a natural looking eyes and if you have wrinkled lids. Use shimmer as a 
      highlighter instead.

9. Brighten your tired eyes with a white liner.
     - Softly line your lower lashline with a white or peach colored liner as this will hide our tired looking eyes 
       and brighten it up instantly!

10. Most important step to a bright and fresh eyes!
     - Dab a dot of pale shimmery shadow like white, champagne or gold at the inner corners of your eyes and   
       also at the middle of your eyelids just above the lashline. See the difference yourself. 


Want a Sexier and Fuller LASHES?

1. Protect your lashes!
    - First of all, remember not to curl your lashes too hard with a curler as this will breaks your lashes.
       For a natural and beautiful lashes, curl your lash with a curler with 3 steps, press the curler softly starting     
       from the roots, middle and then the tip instead of just one hard application at the root as this will gives 
       you a shocking and awful looking lashes!

2. A super curl that last the whole day?
    - Warm your curler with a hair dryer fora few second. Remember to try the temperature of the curler 
       before using it to curl your lashes as you do not want to burn your eyelid.

3. Curler SOS!
    - What if you've forgotten your eyelash curler when you're outstation and desperately in need of curling 
       your  lash for a dinner look? Fear not! Use a teaspoon and warm it up with your palm, place it 
       horizontally and facing downwards, lightly press your eyelash against it and pulling it out and up gently. 
       Do this for a few times and it will give the same effects like the curler.

4. Hard and untamed lashes?
    - Curl your lashes with a heated curler and coat it with a waterproof mascara instead of a regular formula 
      as a waterproof mascara locks the shape better.

5. Daytime VS Nightout
    - Applying a lengthening mascara for a daytime look and a volumizing mascara for a night look. If you have   
       relatively short lashes, apply a coat of lengthening mascara before a volumizing mascara. For a more 
      dramatic effects, apply a few coats of mascara until you achieve your desirable effects but remember, not
      to apply it too thick or else it will get clumpy. 

6. Want a wider and bigger looking eyes?
     - Apply a few layer of mascara at your top lashes and then your bottom lashes as well.

7. How to solve clumpy and irregular mascara application?
    - Instead of applying your mascara in an outwards direction, apply it with a zig-zag direction from the 
       roots. This will separate the lashes to prevent clumps and also gives a fuller, sexier and thicker lashes!!

8. Opps! Too much of mascara and clumps?
    - If you have a lash separator, use it to separate your lashes and remove the clumps. If you do not have  
      one, wash your old and unused mascara wand and dry it. Use it to comb your lashes and remove the 
      clumps. Do  not use any tissue or finger!

9. Smudges? 
    - Do not swipe it away with your finger as it will not remove it but will only dirty and ruin your makeups. 
      Use a cotton bud dipped in eye makeup remover and gently dab away the falls out and smudges. Lightly 
      press some powder over the area.

10. Colored mascara.
     - A black color mascara gives you a fuller lashes and bigger eyes while a brown one gives your a more 
       natural looking eyes for a daytime look. A blue or purple colored mascara funk up your eyes and gives 
       you a flirty and dramatic effects for the dinner date or a party look!


Healthy and Glowing CHEEK

1. First Tip - Less is more
    - Do not overdo your cheek color as it will makes your face looks like an ape butt and makes you 10
      years older.

2. For powder blush
    - Use a professional blush brush for a perfect application. Do not apply a powder blush with your finger as 
       it will look uneven and blotchy.  

3. For gel and cream blush
    - Dab it with your finger and blend. Remember to start with a small amount and work it slowly for your 
      desirable intensity and effect. Remember-Less is more ; )

4. If you have a wide face and want a slimmer look
    - Apply the lighter color blush onto the apples of your cheeks and a darker shade slightly below it and 
      along the line of your cheekbones. Remember to blend to create a smooth transition. 

5. Too much of blusher? 
    - Dab some powder foundation over it to tone it down. Swipe away with a tissue if you're using a cream 
       blush.

6. Where should you apply your blusher?
    - This is how i work my blusher. By using a brush, tap off the excess and softly apply the blusher at the 
       cheekbones and with the remaining of the blusher at the brush, lightly brush it over the forehead and chin
       for radiant face.

7. Want a healthy glow?
     - Apply a highlighter or shimmery powder at the highest point of the cheek bones and blend it outwards. 
       Use a fine shimmery powder and do not overly do it. You want a healthy glow, not shiny face!

8. Run out of blusher?
    - Rub some lippie with the tip of your ring finger and warm it up, then dab 3 dots of lippie over your cheek 
       bones and blend it with your finger. It will give a very healthy glow and i like the effects more than a 
       powder  blush! Watch out! Do not do this if you have super sensitive skin and use a high quality lippie if  
       you want to  use it as a replacement!

9. Contouring with bronzer?
    - Most of the Asian girl do not have tanned skin and we seldom use a bronzer. However, a bronzer is a 
      great tool to contour your face. Applying it near your hairline if you have wide forehead to shorten your 
      forehead, at the side of your cheek near your ears for a slimmer face, at the jaw line and also the lower of 
      your chin if  you have some "baby-fat" there. Most importantly, use a matte bronzer for this. 

10. Clogged pores? 
     - Use the same technique as applying foundation if you have clogged pores. Apply your blusher in a 
        downwards directly to prevent it from getting into your pores.


Sexy KISSES!

1. Do not apply lippie or glossie over chapped lips as this will only emphasize the chapping!
    -Remember to apply lip balm before you sleep for a beautiful lips. What if you have chapped lips in the 
      morning? Rub your lips with a dampen cloth to exfoliate the dry skin and then apply a layer of lip balm 
      and let it sit for 3 minutes. Blot the excess away with a tissue and apply your lip color. 

2. Longer lasting lippie
    - Apply a layer of lipstick and then blot it with a tissue by gently pressing it against your lips. Reapply and 
      that will sit for the whole day. p/s do not use a cheap and low quality lipstick as it's not long lasting and 
      might be dangerous too!

3. Sexy and fuller lips
    - Line your lips with a lip pencil. Use a lip liner shade which is closest to your original lip color to prevent 
      that two-toned effects. Fill your lips with your desirable lip color and dab on some glossy at the 
      middle of the lips for a plumper and fuller lips.

4. Dark and intense lip color
    - Be precised! Line your lip with a lip liner, and then fill in your lips by applying your lip color with a lip 
      brush. 

5. Nude or soft color
    - If you have pale lips, apply the lip color just like normal. For those with darker lips, prime your lips with a 
       foundation and better if you have a lip concealer. Apply your lipstick as desirable. 

6. Thin and thick lips
    - For those with thin lips, it's advisable to apply a layer of glossy after applying your lipstick to fake the 
      appearance of a fuller lips. For those with thick lips, skip the glossy as it will only emphasize it and 
      enhance the appearance of a full lips.

7. Which shades is suitable for me?
    - Lippie can age your down if you apply it wrongly. For a heavy eye makeup, remember to tone down 
      your lippie by applying a soft or nude color. If you prefer dark or bright red lippie, you need to tone down 
      your eyecolor. For those who are over 40s, it's advisable to use a darker or bright red lipstick instead of 
      the pink or nude one as it will only make you look paler and worn out. 

8. Tired of your lippie color?
    - Instead of splurging on a new lippie,  experiment your lip color by mixing it with other lippie to get a new 
      and fresher color. 

9. Remove the remnants of your lipsticks and reapply after meal!
   - If you do not do so, your lippie will run out of your lips and get messy. Blot the remnants away with a 
     tissue and reapply. Do not do so blindly. Do it in front of a compact mirror or head to the washroom!

10. Dab a dot of highlighter over the cupid bow of the lips to emphasize the shape and make it look 
     sharper. 


Hope my tips will help you create a better and beautiful makeup! Stay tune for more!! =) XOXO

Tuesday, 23 August 2011

Simple Oatmeal Face Cleanser

     We face abundance of chemicals everyday, from water and air pollution to pesticides in our food. Many people will opt for natural and organic products in order to maintain a healthy body. What about our skin care product? Aren't you tired of all the products out there made of chemicals and most of them even contain harsh ingredients that can cause reactions if you have a sensitive skin. Why not try a natural face cleanser that's very handy and can be reached within your kitchen-The oatmeal face cleanser.


Why oatmeal? 
     It's one of the best natural ingredients for skin care, especially for those with sensitive skin or eczema. The compound found in oatmeal called avenanthramides helps in soothe and relieving types of skin irritation and inflammation. It also contain saponins, which is good for its cleansing properties as it has foaming characteristics. Oatmeal is highly absorbent and it can absorb the impurities from our skin and thus unclogging the clogged pores without drying our skin. The most important thing is that oatmeal is easily available and it's very cheap.

 How to make your oatmeal cleanser?
     You can use the oatmeal as is in its rolled, flake form or grind it up to make your colloidal oatmeal. Take a handful of oatmeal, grab it with your palm and run them under warm water so that it gets soaked up until it's soft. Squeeze out the excessive water gently onto another palm and rub it on your face without wasting all the benefits in it.
     Start by applying the moisten oatmeal onto your face, rubbing it in circular motion. The bad thing in this is that it can get quite messy and dirty but with all the beauty benefits it gives, just bear with it. Rub it for about one minute and then rinse it off with luke warm water, pat dry your face with a soft towel and apply your moisturizer.
     other option is to make your colloidal oatmeal by grinding the oatmeal into fine powder with a food processor. Just take a sufficient amount, with it mix some water into a paste form and gently massage it all over your face. The benefit is that it also act as an exfoliant in helping to slough off dead skin cells. Ground oatmeal is more readily absorbed into your skin, so it can quickly soothe irritated skin and fight inflammation.


Handy Tips:
1. Put a strainer in my sink or strain it up first with a strainer as oatmeal will become think with the presence of water and cause sink drains.
2. Store your oatmeal in your bathroom so that you will not forget your oatmeal cleanser everytime you want to wash your face.
3. Store your oatmeal in an air tight container in the bathroom to avoid damp air from getting into it as it will promote the growth of bacteria.
4. Use it to replace your daily facial cleanser and you can see visible result in just one day and i ensure that your skin condition will improve within 1 week of usage, day and night.

P/S: You might fall in love with this natural cleanser and dump your facial cleanser aside!!  ♥♥

Pros:
1. Easily available
2. Cheap
3. Prevent clog pores
4. Good cleansing agent
5. Natural and free from chemicals
6. Can soften the skin
7. Pleasant smell

Cons:
1. Can get very messy when using it
2. Hard to clean off after use
3. Can clog sink if not treated properly
4. Not convenient esp for travelling

Hope you guys like it and thanks for reading.. XOXO

Wednesday, 13 July 2011

6 Easy and Useful Make Up Steps


Beauty is only skin deep. For a woman to be truly beautiful, she must be beautiful on the inside as well, which mean once should be kind, compassionate and have all the good values. Well as for outer beauty, cosmetics and techniques for applying them are essentials, especially when we age. If you think that what you need is only natural beauty, please ignore this blog as i strongly disagree with you. Makeup is a way to make us look much better, and a way to boost up our confident. Will you look good if you take a photo-shot without any makeup on? The answer is definitely NO!! 

Well, if you're on the same side with me, let's proceed. =)

Firstly, you'll need
  • Quality Foundation
  • Quality Powder
  • Quality Eyeshadow, eyeliner and mascara
  • Eyelash Curler
  • Skin toned and green concealer
  • Quality cheek blusher
  • Cosmetic brushes


✿Step 1✿
The very first step for a basic makeup is to clean your face with a gentle facial or cleansing foam. Be use to wash your face with circular upwards strokes to prevent sagging and fine lines. Rinse thoroughly with water and gently pat dry your face with facial towel or cotton pad. 

✿Step 2✿
Apply toner with a cotton pad and then a moisturizer, either with sunscreen or without. If you have one that's without sunscreen, you can apply sunscreen after your moisturizer. Let the moisturizer being fully absorbed by your skin for 5 minutes. Next apply your foundation that suits your skin's natural colour and texture evenly. Apply foundation with gentle, upward strokes and remember to blend the foundation gradually from beneath the chin to jawline. Apply concealer to conceal your puffy eyes or dark circle. Do not rub it in but dap it with your ring finger gently.

✿Step 3✿
Apply your cream blusher if you want a longer lasting effects. Then set your makeup with a translucent powder with the powder brush. If you're using powder blusher, apply it after setting your makeup with the translucent powder lightly. The way to apply the blusher is by smiling to determine your cheekbones and blend the blusher from there towards the temples.

✿Step 4✿
Brush your eyebrow and fill in gaps with light strokes with an eyebrow pencil. Be sure to shape your eyebrow before doing this. Apply eyeshadow. Apply the lightest shade as a base, deeper shade on the eyelid. Apply a light shade below the brow to make your eyes look bigger and energetic.

✿Step 5✿
Apply eyeliner with feathery strokes. Curl your lashes with an eyelash curler before applying mascara. Apply mascara carefully from the base to the tip. A brown mascara create a warmer look which is suitable for day time look and a black or blue one create a dramatic look for night time. 

✿Step 6✿
Apply lip liner, lipstick or lip gloss. Choose a sheer lipstick for a more natural look, shimmer for a pearly and subtle coverage or cream one for matte finish. Lightly outline your lips with a lip liner that matches the lipstick colour. Fill in your lips with lipstick and blot them with a tissue. Add some sexy shine to your lips by adding a thin layer of lip gloss over the lipstick.


Warning:
-Always use quality cosmetics at a price you can afford, try not to use any imitated cosmetics as it will cause breakouts in your skin.
-Remove your makeup when you get home. Never sleep with you make-up on your face overnight as your skin needs to breathe.

Well let's look at some of the celebrities' photo-shot with and without makeup.. 


The foundation, bronzer, blusher etc instantly make her face look amazingly energetic than without makeup.

Concealer and foundation hides away freckles or pigmentation on her cheeks.

The eyeliner and mascara/fake lashes instantly brighten up her eyes.

Look at that saggy eyes before makeup. And the fine lines.

Concealer hides dark under eye circles and even out your complexion.

Makeup makes your face appear slimmer.


Now you believe what i mean? Look at the wonders of makeup with the correct techniques!! You can hide all the imperfection that you want. Name it, fine lines, freckles, pigmentation, discoloration, eye bags, under eye dark circles, scares, acne, mole, saggy eye, tired face, and etc. So what are you waiting for, practice makeup everyday and make yourself a more confident you!! XOXO =)

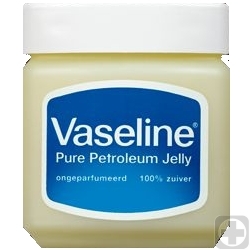
Vaseline aka Petroleum Jelly

Oh gosh, woke up early in the morning with a bad night sleep. Wonder why.. The happy things are, i'm going to get my hair dyed, after 8 months LOL and i love my baby smooth feet!! I have been applying Vaseline all over my feet and put on a pair of socks after that for 2 nights and the result is really good!! My super dry, calloused feet is not as smooth as a baby feet again! Just 2 nights!!


Basically, Vaseline @ Petroleum Jelly is a mixture of mineral oils, paraffin and micro-crystalline waxes that are blended together to form a smooth jelly that has melting point just above human's body temperature. It literally melts into skin, flowing into the spaces between cells and the gaps in our lipid barrier. It then resolidifies and lock them self in place.

It serves two function: Keep the outside world out i.e to protect skin from the effects of weather and exposure. Second it acts as a sealant to help keep the inside world in i.e it forms an occlusive barrier to the natural water loss of our skin. So skin is protected from drying elements, enabling skin-softening moisture to build up naturally from inside the skin itself. From here, please understand that Vaseline doesn't provide any moisture to our skin, but it helps locking the moisture in our skin from drying out.

Just a lil of the history, petroleum jelly in it's raw form was actually a bad things to U.S oil drillers in the late 1800's. It has a paraffin like texture that stuck to the shaft of ther rigs and caused them to seize up. However, they do apply it on their cuts and wounds as it has good healing properties. So after that, a person name Cheseborough opened his first factory in Brooklyn, NY under the brand name "Vaseline" as an ointment for skin injuries in 1870. So this is how they found Vaseline and below are just a few wonders of Vaseline:

For household use:

1. Apply thick layer of Vaseline on the inside of the Super Glue Cap threads after first use to keep it from gluing itself shut.

2. Apply a thin coating of jelly on shoes, boots and purses with a soft cloth to keep them shiny and looking great and repel water and road salt at the same time.

3. Quiet a Squeaky Door hinge with a coating of Vaseline on the hinge pin.

4. Keep Your Hand Clean by rubbin on Vaseline before you begin with the chores as it keep paint, stain, car grease and garden dirt from your skin. Just wipe it off with paper towel and wash away with soap.

5. Apply Vaseline along your hairline and ears before you begin to prevent Hair Colour from staining your skin.

6. Apply Vaseline on Cuts and Scrapes to protect it as it act as a barrier to keep out moisture and bacteria.

7. Use it as a Moisturizer all over body. It's suitable even for people with sensitive skin as it contains no fragrance of harmful chemical.

8. Prevent Car Battery Post corrosion by applying a layer of Vaseline on the terminals.

9. A thin coating of Vaseline on Ourdoor Lights bulb threads can prevent them from sticking when they need to be replaced.

10. Rub Vaseline on the skin around your nail before polishing so that the Nail Polish can be easily wiped off if you make a mistakes.

11. Apply Vaseline around the inside edge of cans to form an Air Tight seals.

12. Frozen Locks can be fixed or prevented by smearing Vaseline on the shaft of the key and insert into the lock and work the key nad lock for a few times to lubricate them.

13. Apply Vaseline along the runner on a Sticky Drawer to make it slide freely.

14. Apply Vaseline to your feet, right after bathing and put on a pair of socks for the whole night. It keeps the moisture on your skin from evaporating and makes your feet softer.

15. Apply to prevent Diaper Rash to replace expensive ointments and creams

16. Apply some Vaseline at the Tight Finger Ring and it will slide in or off easily.

17. Keep Nuts and Bolts from rusting by rubbing them with Vaseline before using.

18. Rub petroleum jelly on the damaged Water Rings on Wood Furniture and let it stand overnight, removes excess jelly and buff with a soft cloth.


For Beauty Use:

1. Put a thin coat on your eyelash and you will find your lashes grow longer and thicker after some time.

2. Apply some Vaseline at your eyebrow to tame it.

3. Use it as eyebrow colour. Mix some Vaseline with your desirable eyebrow colour using eyeshadow, apply them at your eyebrow with a thin lip brush or eye brow brush. This will make your brow looking beautiful and tame.

4. Apply Vaseline on your feet and elbows everyday-they will stay soft!!

5. Apply Vaseline on your cuticle a few times a day for a healthier and better looking cuticles.

6. Apply Vaseline on your lips to cure that chapped lips.

7. You can use Vaseline as lip gloss, it's safe.

8. Apply Vaseline at pulse point before applying your perfume, this makes the perfume scent stays longer.

9. A natural Moisturizer for people with sensitive skin.

10. Moisturizes dry skin.

11. Apply Vaseline to your teeth to prevents lipstick sticking to teeth. Beauty pageants and celebrities actually did that!!

12. Mix with sea salts and some essential oils to make body scrub.

13. Can use it to replace massage oil.

14. People with extremely dry skin or eczyma can use it for night cream.

15. Protects skin from harmful pollutants.

16. Can be used as makeup remover.

17. Applied a gentle amount on your cheek for a dewy look. Remember not to apply too much as you will end up looking oily.

18. Mix it with your blusher and apply it at your cheek to create that long lasting healthy glow on your face.

19. Apply a thin layer of Vaseline before applying your eye shadow to make it stay longer and make the colour more intense.

20. Apply some Vaseline at your ear lobe when you have difficulties with earring insertion.

21. Apply Vaseline on your scalp to condition your scalp, let it stay for 15 minutes and shampoo your hair.

22. Apply on scar(face or body) to prevent bacterial infection.

23. Apply a thin layer after you get a tattoo, it helps in healing and protecting the newly done tattoo.

24. Apply some Vaseline and rub it with your palm, scrunch through your hair for a messy and choppy look.

25. Apply a small amount on the ends of your hair to hide dry and split ends.

25. Mix Vaseline with powder eye shadow to create a more solid and intense eye shadow. It also prevent the powder eye shadow from getting all over your face.

26. Apply vaseline on your lips and cover your lips with a cling wrap for 5 minutes, then scrub your lisps with a toothbrush to exfoliate and they will be baby smooth.


Wow!! Look at all the amazing things you can do with Vaseline... Grab one and make it your best friend as it get quite handy when you run out of something such as your makeup remover, body lotion, moisturizer, scrub and etc.


There're alot of comments stating that Vaseline or petroleum is actually poisonous, clogged pores and etc the petroleum jelly in the market all proven safe for all its uses and i think those are just misconceptions. It has been in the market for so many years and if there were any true problems with it, we would already have seen them by know. It's okay if you disagree with me as these are solely my opinions and experiences. =)


Warning!!

-Do not use Vaseline on burns(including sunburns) as it will trap the heat on your skin and make the damage worse.
-Do not use Vaseline for nasal congestion or dryness because when inhaled, it might go into your lungs and cause lipoid pneumonia.
-Do not use Vaseline on any latex product such as condom as it can weaken and damage latex.

~~~Happy Trying~~~